Tempo Mapping
From RBN/C3 Documentation
Tempo mapping is the first step in the authoring process. It determines the track speed and how rhythmically accurate the notes will be on the track. We use the count-in in your Backing Tracks, and the Kick Drum Track to determine tempo. In the past, this has often been a painstaking task, but with Reaper the process has been simplified by a couple of Quick Keys.
Contents
Create a Tempo Track
Select all audio tracks. Left click the left edge of your backing tracks and drag the start of the audio file to the beginning of the first transient.
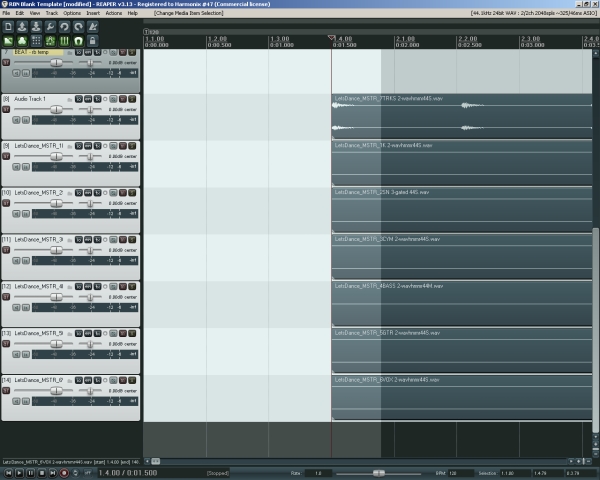
Once this is done, slide all audio tracks back to bar 1, beat 1.
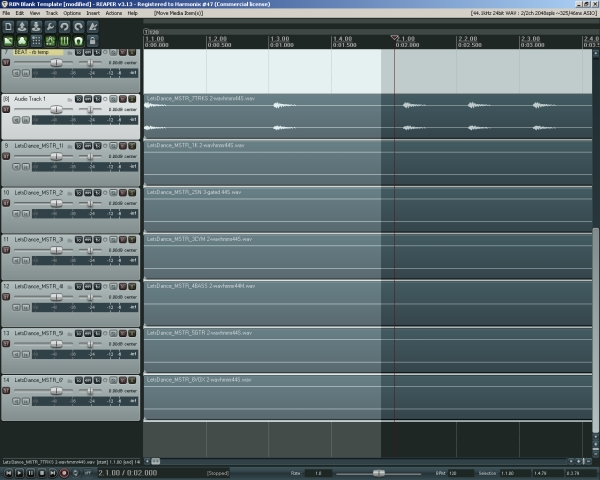
Select your backing tracks. The Tab command allows you to move from transient to transient. Using Tab, move the cursor to the beginning of the first transient in the second bar.
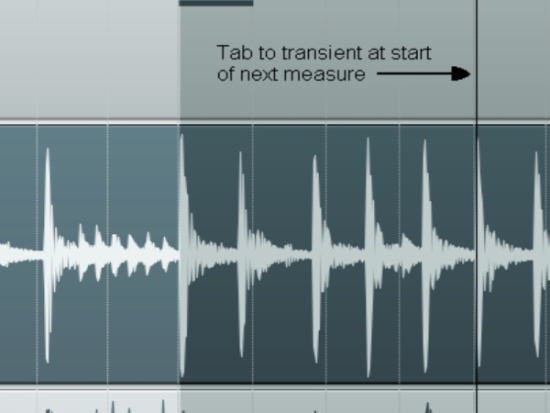
Once your cursor is there, use the Q command. This will change the tempo based on the length of the bar, without having to highlight back to the beginning of the previous bar.
After you have the count-in bars set, select the Kick Drum Track, and use Tab to move the cursor to the beginning of the first transient in the third bar and use the Q command again. Repeat as needed throughout the song. If the tempo of the song is relatively constant, you should only have to use the Q command at the beginning of each bar. If there are major tempo changes in the song, you may have to use the Alt+Shift+C command to set up the tempo map for the drastically faster or slower section.
Time Signatures
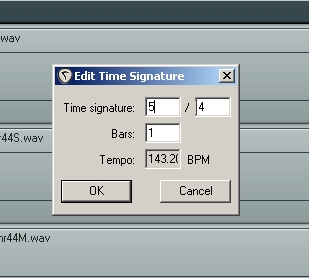
If, when creating a tempo track, there is a change in meter (ie: 4/4 to 3/4), Tab to the beginning of the next bar, and use the T command, instead of Q. The T command works in the same way as Q, but will bring up a dialogue box, with spaces to enter the new meter. This will adjust the meter of the song, while preserving the proper tempo. As long as the meter of a song stays consistent, there is no need to use the T command. It is strictly for adjusting to a time change.
Manually editing the Tempo Map
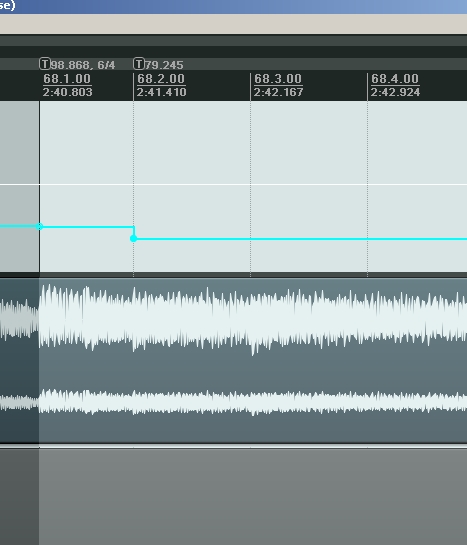
If when creating a tempo track, there is a ritardondo or accelarando, where you need to add tempo markers on a more gradient level, they can be added manually. Drag the audio track that you are using for tempo reference up next to the tempo track. Use Shift+Left Click on the tempo track to enter a Tempo Marker.
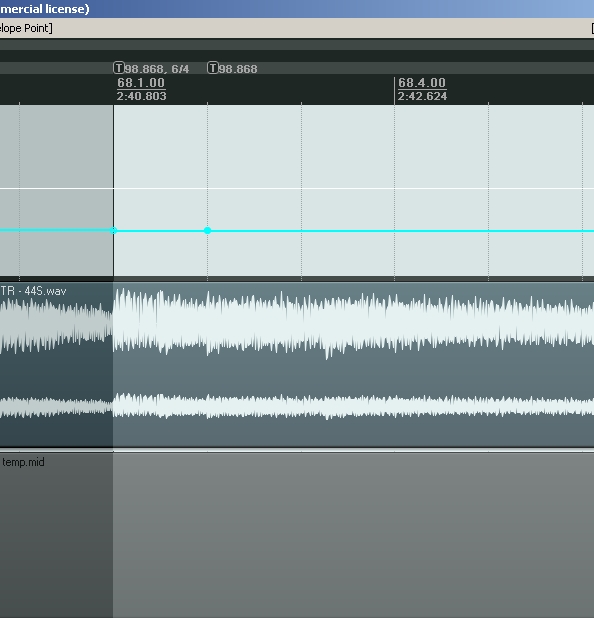
Left dragging on the new tempo marker will move it up and down. If you need more granular control of the marker's movement, hold down Ctrl after you have started dragging the marker. Using your audio file as reference, drag the marker until the transient is lined up with the appropriate beat.
Alt+Left click will delete a tempo marker.
Shifting the Tempo Map
There may be times during the authoring process where you need to add or remove space from your song. In either case, you definitely want your tempo map to stay synched with your midi and audio tracks. To keep everything in synch, use one of the following 2 actions: Adding space to the beginning of the song:
- Move the playhead back to the start of the project (1.1.00)
- Hold shift, then left-click (or left-arrow scroll) to a point in your project that matches the desired amount of space to add. For example, if you want to add exactly 2 bars of space, left-click on 3.1.00. This will select and highlight the first 2 bars of your project.
- Run the "Time Selection: Insert space at time selection (moving later items)" action from the Action list. This action will add blank space at the beginning of your project and shift everything (MIDI items, tempo markers, etc) later.
Removing space from your song:
- Select and highlight the amount of space you want to remove, as noted in the first 2 steps above.
- Run the "Time Selection: Remove contents of time selection (moving later items)" action from the Action list. This action will remove everything from the space you earlier highlighted, shifting everything after the highlighted section (MIDI items, tempo markers, etc) earlier.