Reaper for Beginners
From RBN/C3 Documentation
The main Reaper page assumes that you understand some basic terms and concepts around editing digital audio. If you are brand new here's some basic info that may help.
The docs assume a couple things:
- You have a separate kick drum track, and
- There is at least a kick at the first beat of every measure (1st transient of the bar).
A bar is simply a measure, a group of four beats if you are dealing with a 4/4 time signature. Reaper gives you both the midi position and the time position for where your cursor is set. The midi position looks like 7.1.00 (bar number.beat number.hundredth of a beat) and the time position looks like 0:11.589 (minute:second:millisecond).
If you don't have a separate kick drum track, or if the drums don't come in until 45 seconds into the song, it would be better to follow another instrument (the bass guitar, for example, or a rhythm guitar) until the drums do come in.
Follow the Tempo Mapping By Hand section of the Mix and MIDI Setup doc. You can hold down Ctrl in addition to moving the mouse to get finer movements of the Tempo Map line.
Of course, this is all assuming you can see the Tempo Map line. To show it, click View and then Show Master Track (Ctrl+Alt+M). The Master Track should appear as an item at the top of the item list. Click the env button and then mark an X in the Visible box across from Tempo Map.
Click the thumbnail below for a visual explanation of what the Master Track looks like in Reaper. I also pointed out examples of what a snare, hi hat, and kick hits look like on the waveform when they are all on the same track (Figure 1). It should be pretty obvious visually where a new measure starts if you have a standard sounding drum beat.
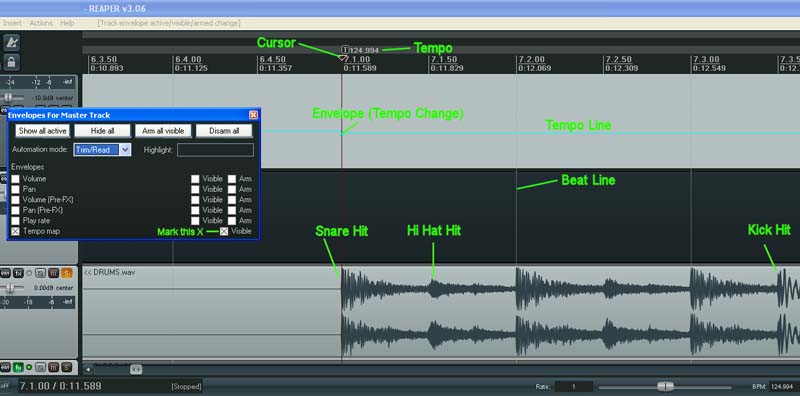
|
| Figure 1: Reaper interface. |
Hopefully that's enough to get you up to speed on basic tempo mapping.